Google Tag Manager (GTM) Setup Guide
Find out how to get started with Google Tag Manager
To make this as easy as possible, we’ve made some pre-sets of tags to cover the most frequently used advertising and analytics platforms; Google Adwords, Facebook, and Google Analytics. Feel free to add other (custom) integrations to the ticket shop within your GTM account.
Creating a GTM Account
1. Go to Tag Manager in Google.
2. Log in with your Google credentials.
3. When you open Tag Manager for the first time, you’ll need to create a new account. You’ll automatically be directed to the ‘Add a New Account’ page, where you enter your company's name and your container.
EVENTIX TIP: If you’re using more than one ticket shop and you want to track these shops separately, we advise you to create multiple containers. One for each ticket shop.

4. The Eventix ticket shop is a web-based application; therefore, you’ll need to select web. Now you have successfully created your own container.
Activate the Debug mode in Google Tag Manager
1. Select your account at the top of your screen e.g. “EventixGTM”.
2. Navigate to the workspace, where you can activate the preview mode of GTM.
You use the preview mode to see what information is sent to GTM and its connected tags. You can now inspect what action triggers the tag. For example, when a visitor enters the ticket shop. This action will trigger the “pageview” tag in Google Analytics.
Integrate Google Tag Manager with Eventix
1. Copy the GTM container ID from your workspace. You can find the container ID in the workspace at the top of the screen.
2. Open a new browser tab and log in to the Eventix Dashboard.
3. Select ‘Events’ and click on the blue ‘Edit event’ button next to the event you want to connect to your GTM.
4. Navigate to “Shops” by clicking on the shopping cart icon on the left.
5. Create a ticket shop if you have not done that already. If you have, click the “More options” icon and “Google Tag Manager code” to edit an existing shop that you want to integrate with GTM.
6. Paste the GTM container ID into the ticket shop of your choice and click save.

The ticket shop is now connected to your GTM container. To start tracking, we need to set up the tracking within the Google Tag Manager workspace.
Setting up tracking in your Google Tag Manager workspace
1. Navigate back to your Google Tag Manager account.
2. Right-click on the below link to the JSON setup file and select 'Save link as':
http://custom.eventix.nl/documents/gtm.json (alternatively, you can open the link and right-click on the page and 'Save as').
Import Tracking Presets:
Use the JSON import file below to import the following;
- Custom variables tracked in the Eventix Ticketshop.
- Standard triggers for common shop events.
- Preset integrations for the most common tags; Facebook, Google Analytics, and Google Adwords.
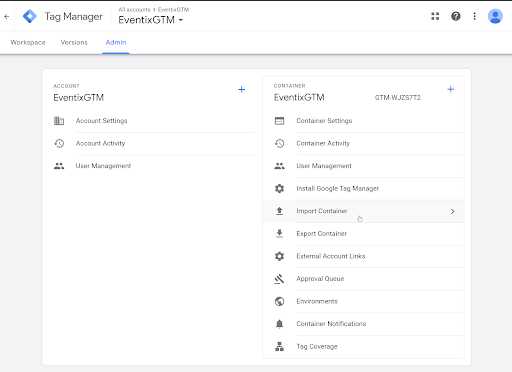
3. Navigate to admin.
4. Select the right account and container.
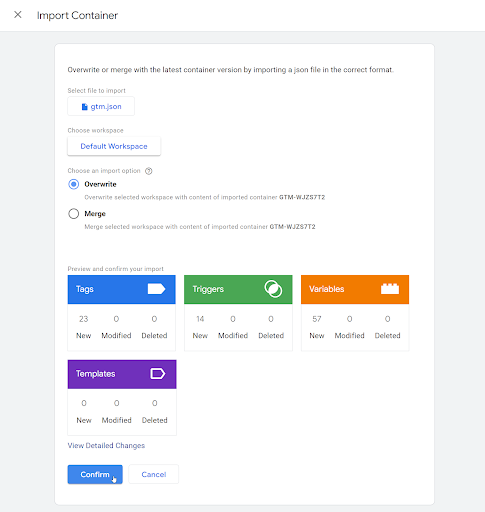
5. To import the JSON file, click on import container.
6. Select “existing workspace”.
7. Overwrite the container to make sure all the basic settings are correct.
8. Click confirm to finish the import.
Connecting your pixels to the pre-set container
To make the Container work, it has to be connected to your own tags, such as Google Analytics, Meta Pixel, etc.
1. Go to the Workspace.
2. Navigate to Variables within GTM.
3. Scroll to the bottom and select the right variables that you want to use.
4. Once you’ve selected the variable you want to use, you’ll need to change the tracking ID placeholders (XXXXXXX) into your own Tracking IDs.
5. If you want to use any of these integrations, replace the placeholders with your own tracking IDs.
EVENTIX TIP: Use the same Google Analytics code you use for the website in the ticket shop. When you use the same Google Analytics code you enable cross-domain tracking.
Verify setup in Google Analytics:
Open one of your shops. Then in Google Analytics, open the Real-time Dashboard and select Events. The list should look something like this:
Enabling E-commerce tracking
To set up E-commerce tracking, you need to install Google correctly.
1. Go to https://analytics.google.com
2. Select the right website.
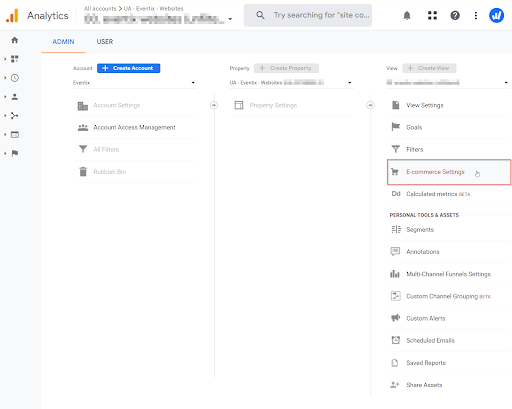
3. Navigate to Admin.
4. Select the correct account, view and select in view E-commerce Settings.
5. Enable E-Commerce and turn it on.
6. Submit.
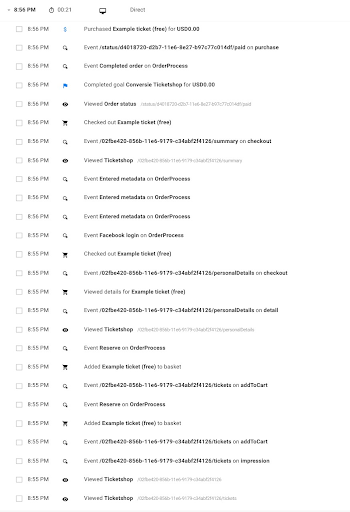
Once you’ve enabled e-commerce tracking in Analytics and someone completes an order, you should be able to navigate to Audience and select User Explorer.
A typical successful order looks like this:
You now have enabled Google Tag Manager set up to track your links. This gives you insights into how your links are performing.
Thanks for reading, if you have feedback or questions about these guides, please get in touch with us at info@eventix.io.


