Ticket shop
Easily embedded into your website
Easily embedded into your website
Data-driven decision-making
Easy to use and mobile-friendly
Full service queue management
We can help make your ticket sales a breeze
Seamlessly connect your favourite tools
Avoid administrative headaches
Easy and safe for your ticket buyers
Flexible ticket types for each audience
Upsell and increase your revenue easily
Offer tickets for specific dates and time slots
Handle hybrid events with flexible ticketing
Easily manage multiple ticket shops
Manage your seating plans and entrance
Control queues and busy doors efficiently
Manage events with custom seating plans
Promote multiple events in one ticket shop
Paid events online using Eventix and Zoom
7 April, 2020 - 4 min. read
Right now, we’re online more than ever. A lot of us only really meet people in the virtual world, and because of that the online tools for video calling are running around the clock. There are all sorts of online tools you can use to stream your events, such as Youtube and Lifestorm. In this blog, we zoom in on Zoom, as it allows you to host paid events. You’ll read how to do this in the blog!
A paid event on Zoom can come in all different shapes and sizes. A bingo event is suitable for Zoom, much like a virtual beer tasting classes, but even when you want to host business events, you can let the speakers tell their stories through Zoom.
When hosting a paid event through Zoom, you’re using webinars, which are different than meetings. On Zoom, a meeting is intended for a team meeting, conversing with your friends or having a one-on-one conversation with a client. The meetings are only intended to support a handful of people, but the webinars can be used for large groups (50+ people). The privileges in a webinar are slightly different: In a meeting, each participant has the same privileges, whereas, in a webinar, you’re the host and have all the privileges. You can find all the differences between a webinar and a meeting here.
Before hosting a paid event in Zoom, you’ll need to take a few steps first.
The first step is to create a webinar in Zoom. To create a paid webinar you’ll need a license. Zoom offers these licenses in different forms, the price being dependent on the number of visitors attending your webinar. The cheapest license is €37/month. This license allows 100 people to attend a webinar. You can purchase a webinar license on this page.
Next, you set up your event. It’s important that you toggle ‘Registration required’ on and ‘Require webinar password’ off. Visitors not needing to register means the webinar is free, and the use of a password makes buying a ticket unnecessary.
When you’re creating a webinar you can change the URL. Just make sure the unique Zoom webinar stays intact.
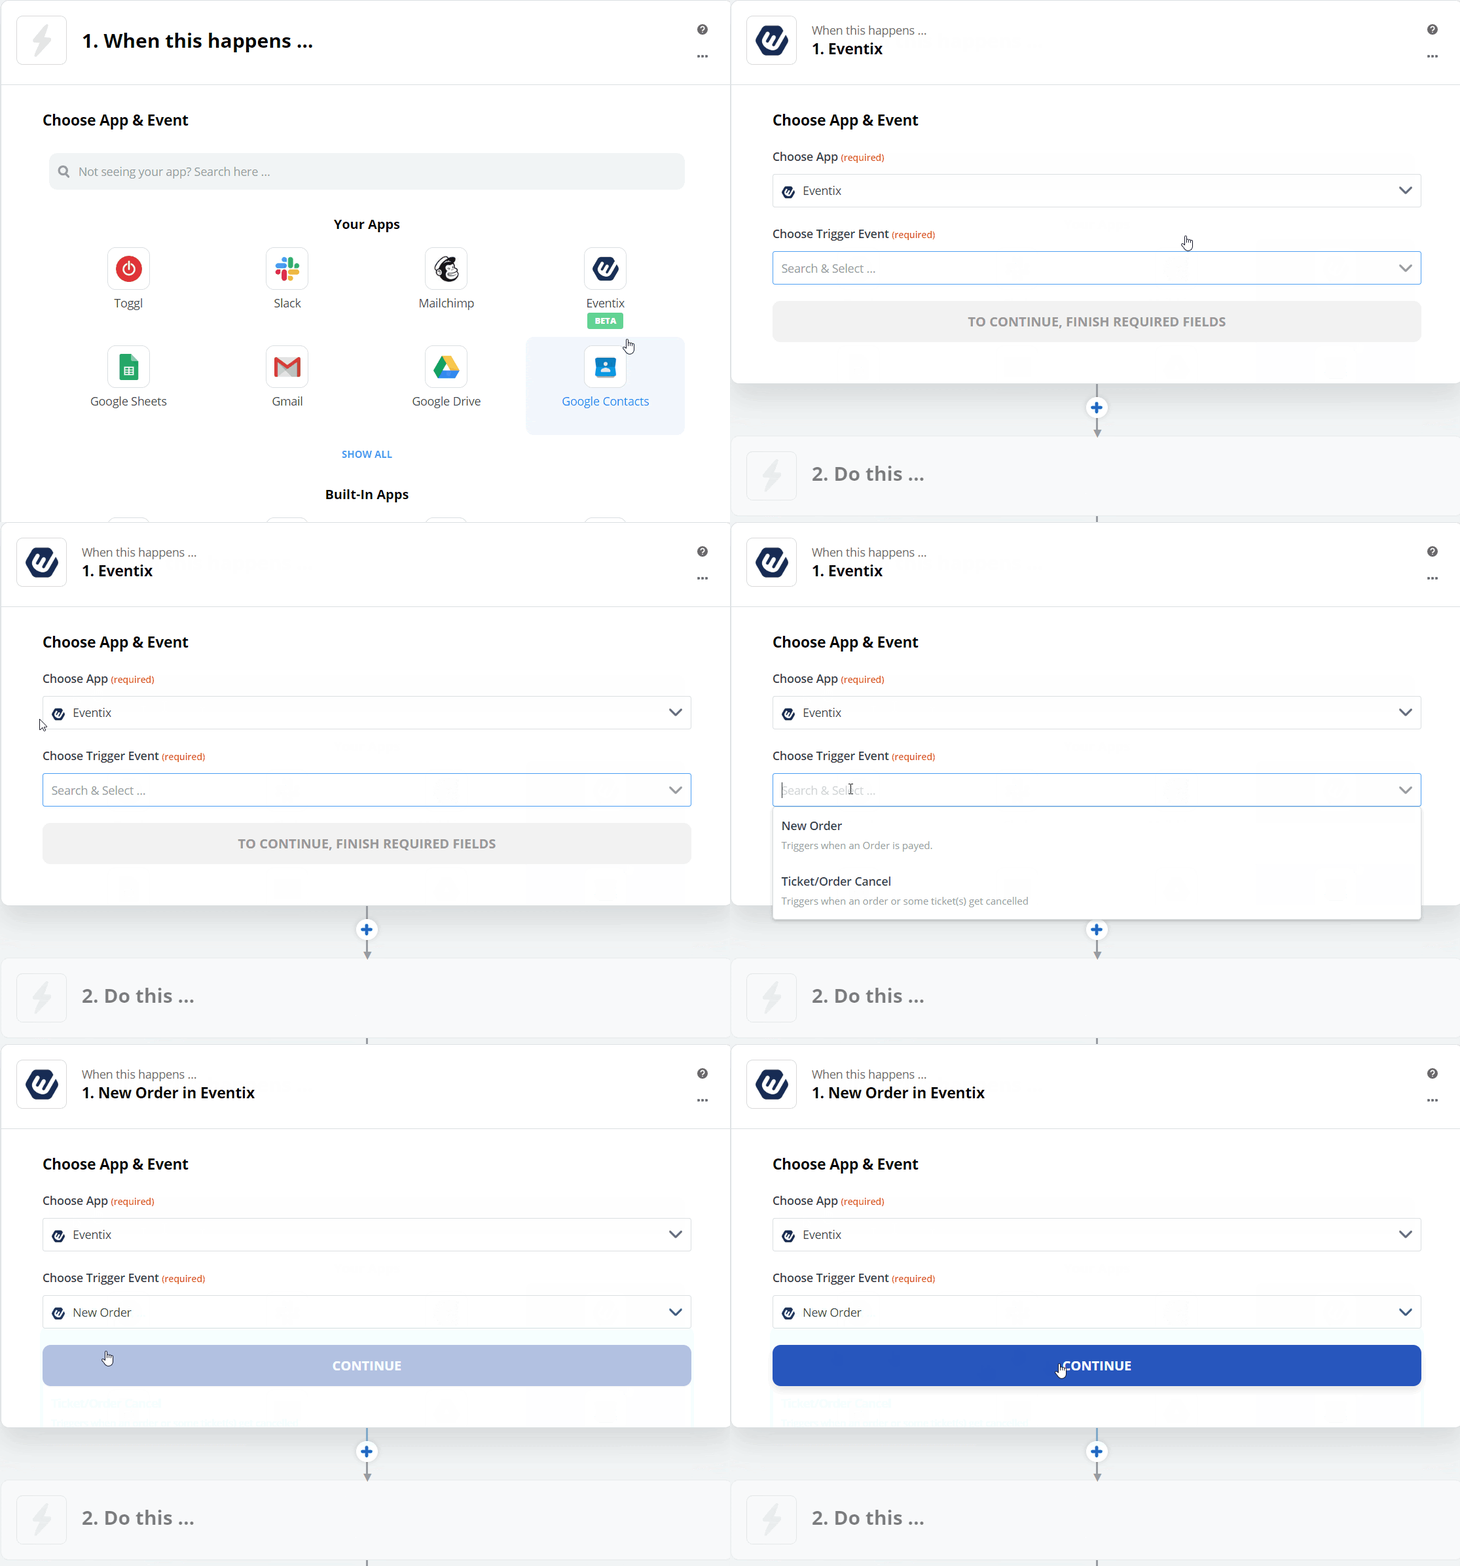
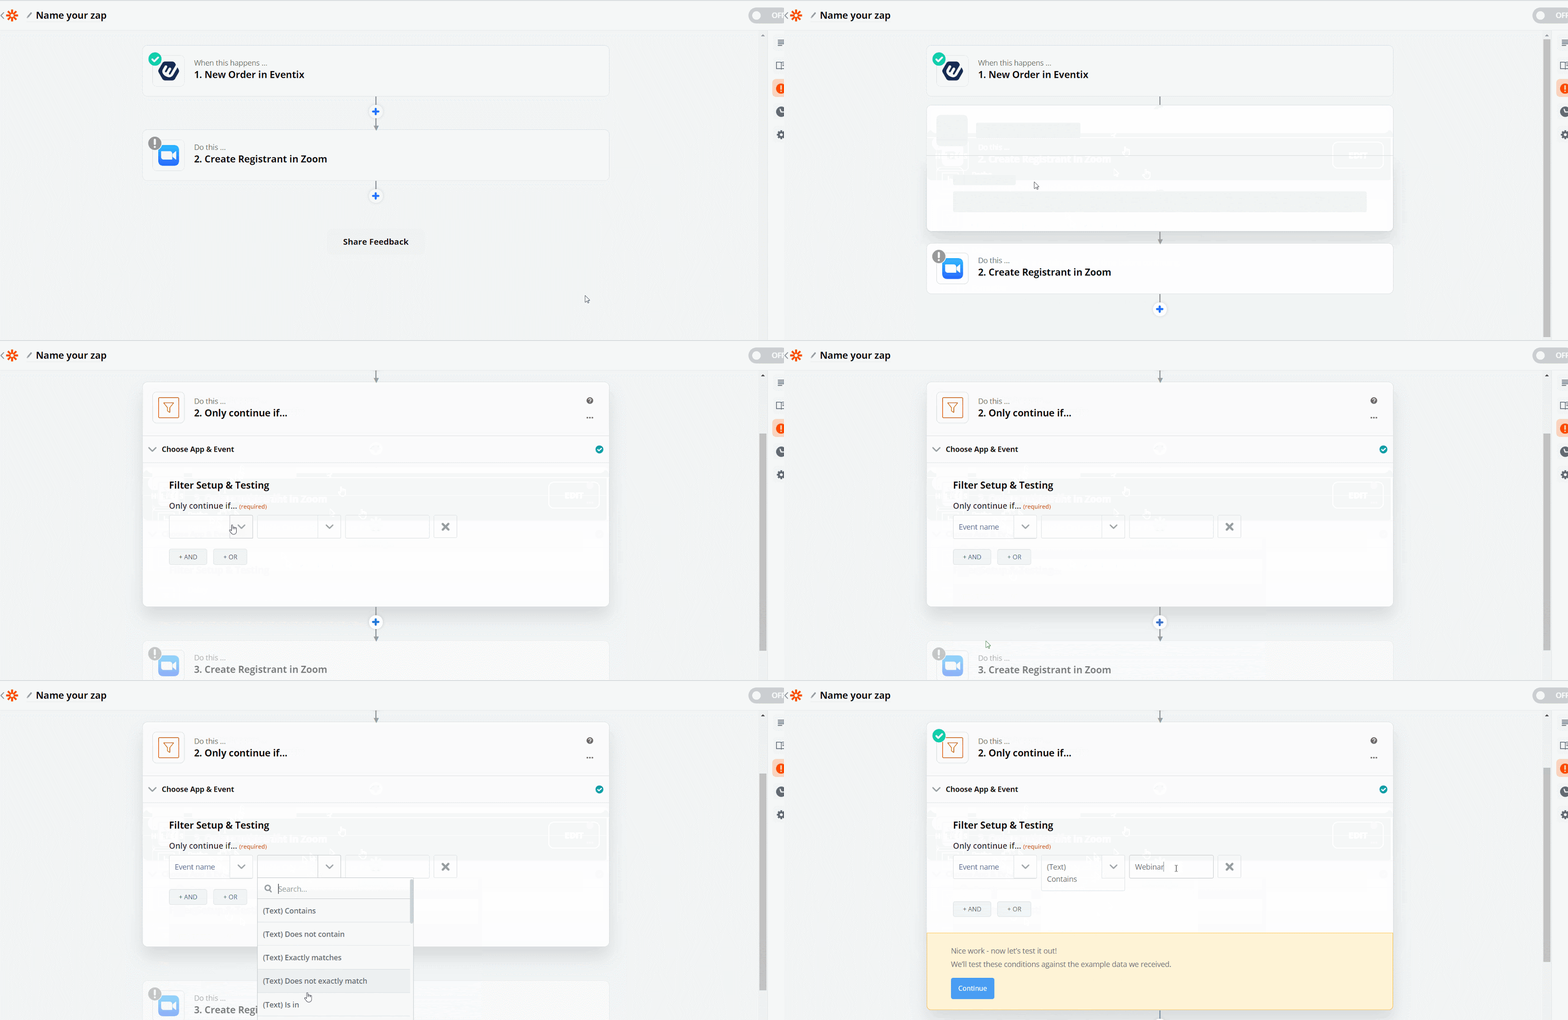
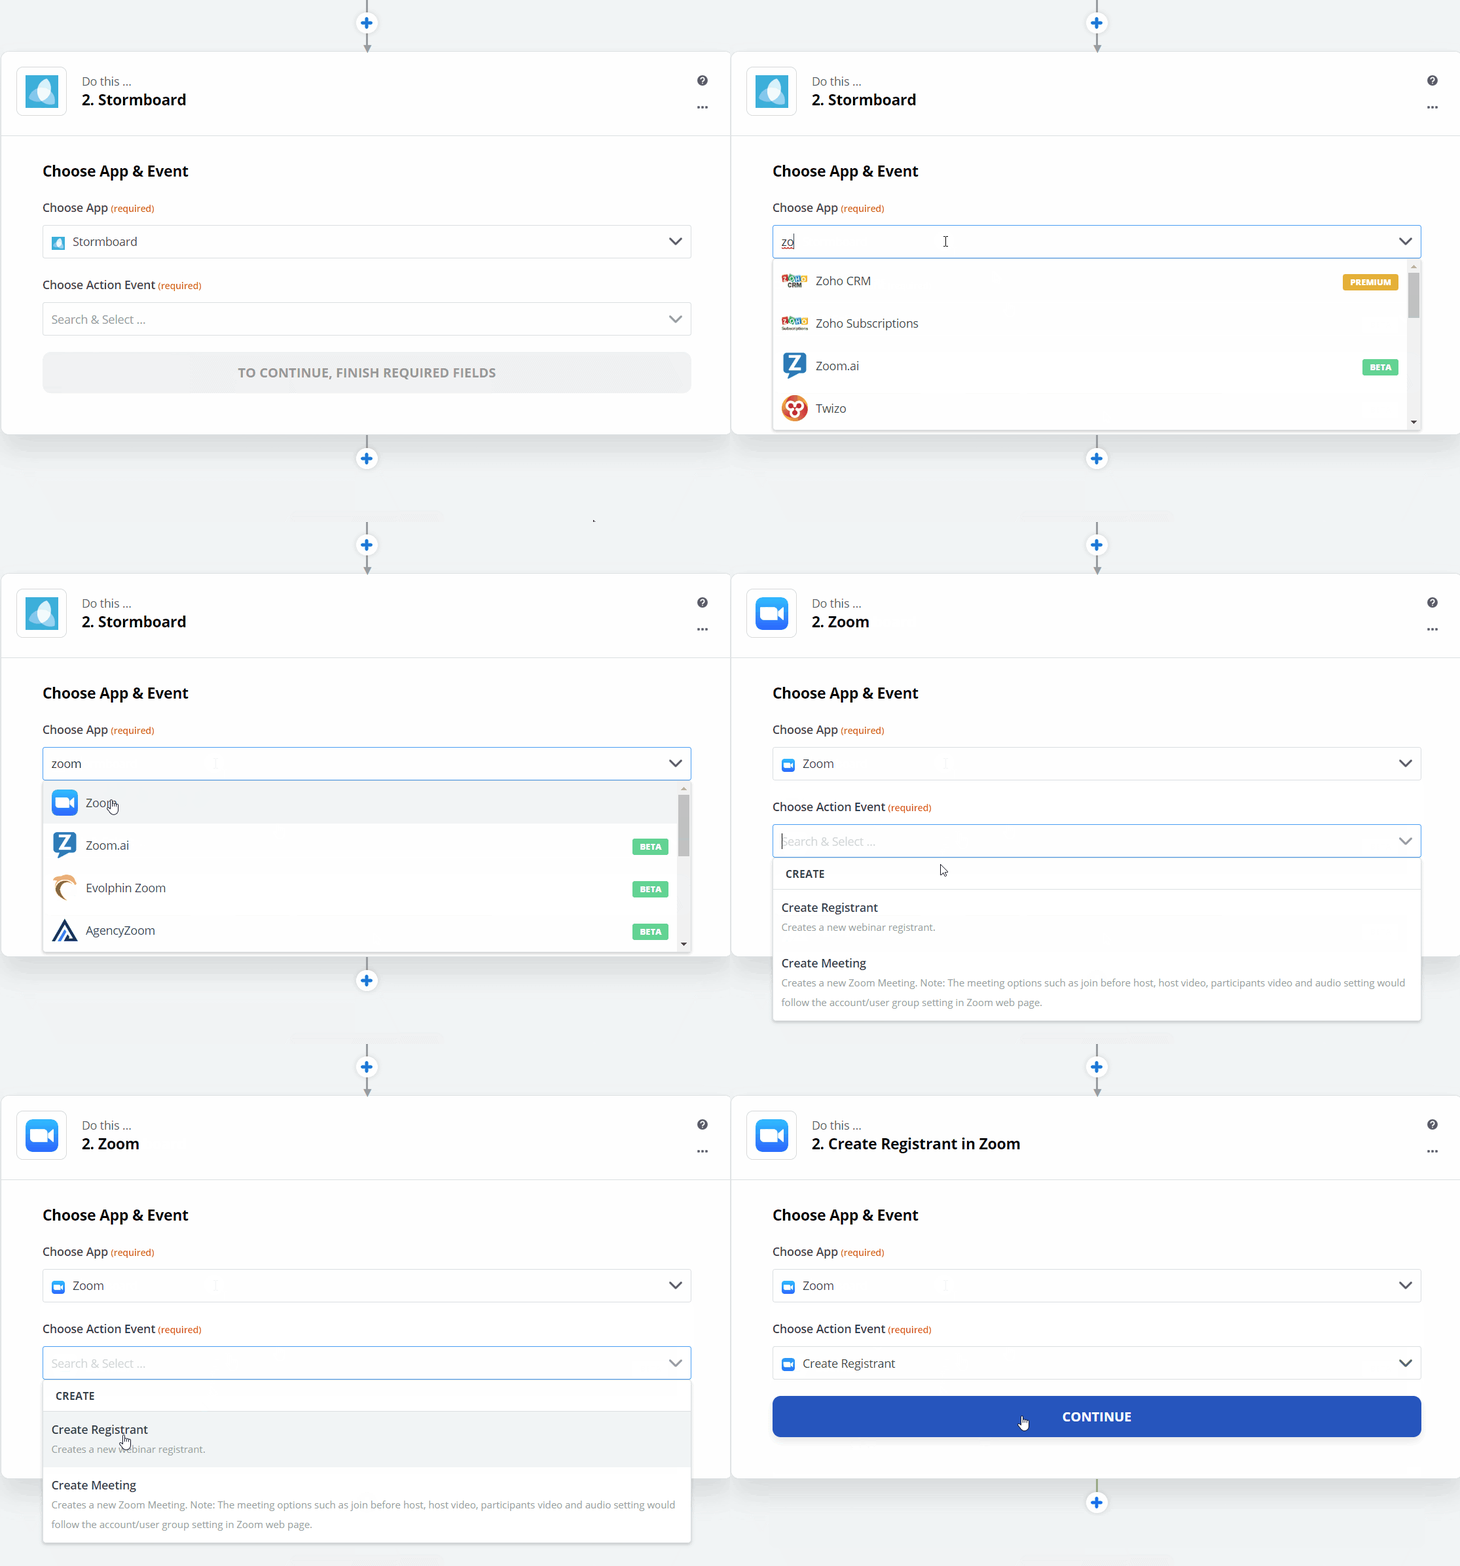
You’ll want to use Zapier when connecting Eventix to Zoom. We’ve talked about Zapier before; it’s a tool automates processes through the use of triggers. In the case of Eventix and Zoom, this means that when a visitor purchases a ticket (the trigger) they are automatically registered for the webinar.
But how does this work?
First of all, we invite you to use connect Eventix to Zapier. Once you’ve done that, you can create your first automated process. In Zapier these processes are called ‘Zaps’.
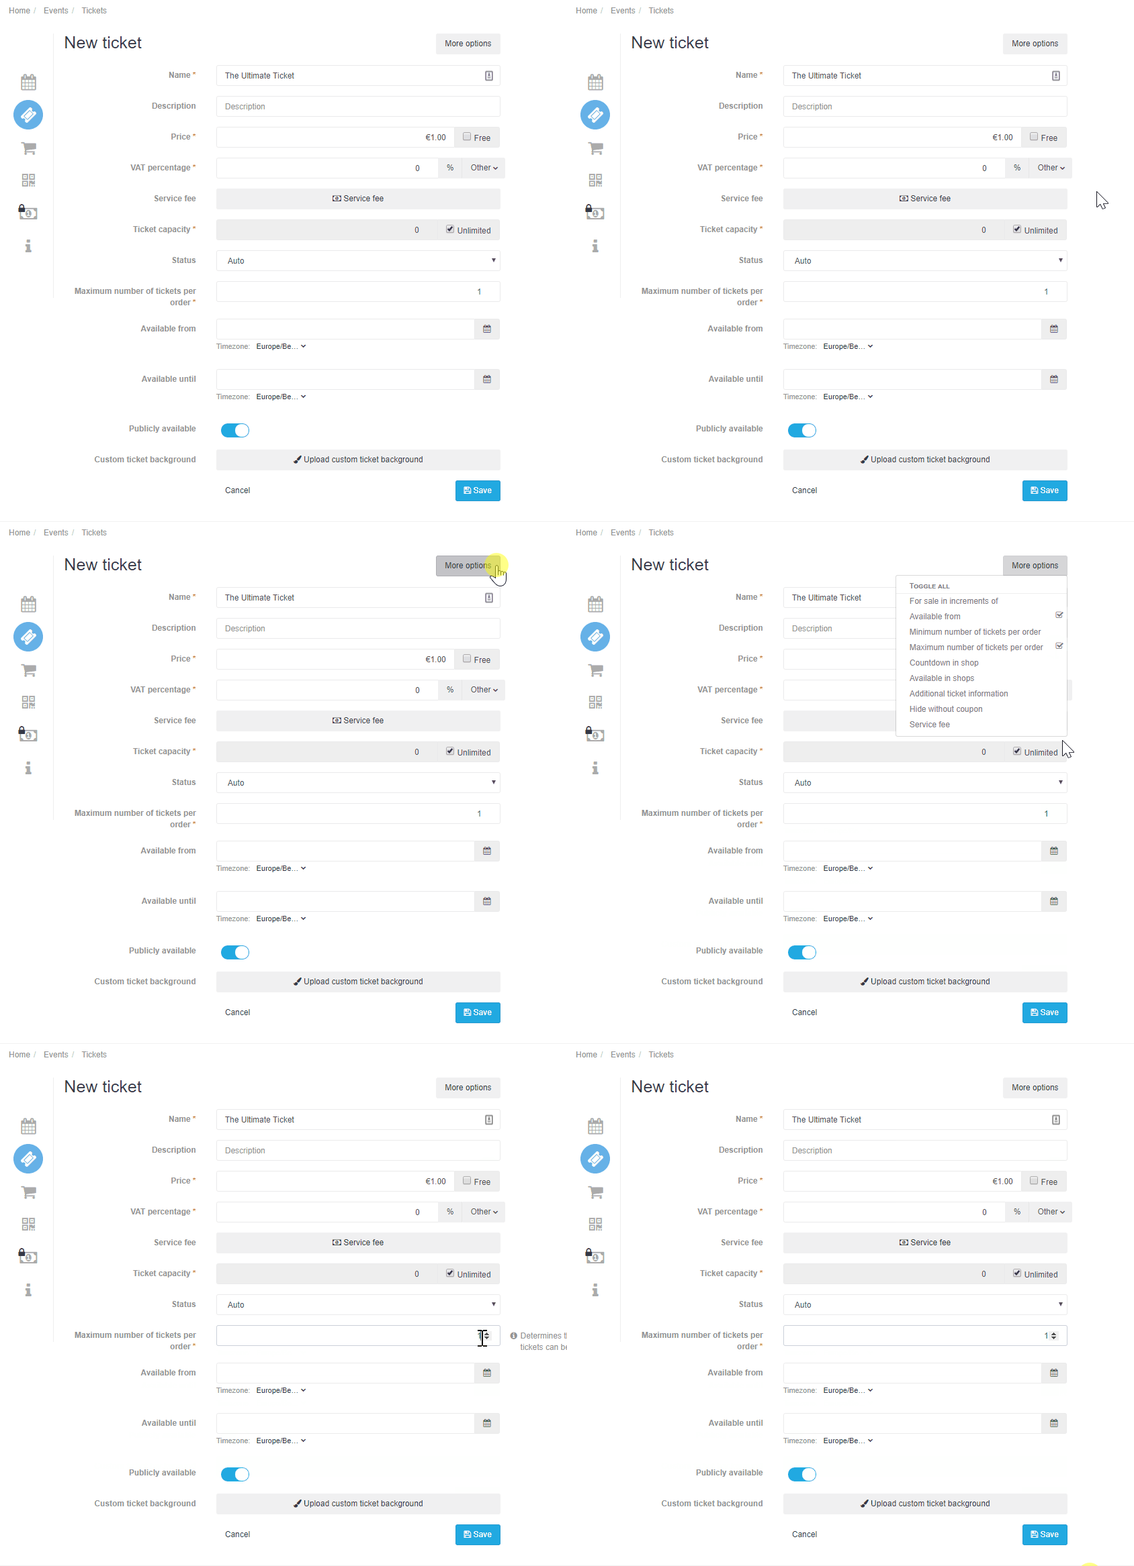
Create a new event in the Eventix Dashboard or edit an existing one. Caution! When creating tickets, it’s important that you set the maximum number of tickets to ‘1’. Don’t know how to edit ticket settings? In our guide on how to create a ticket, we show you the ropes.
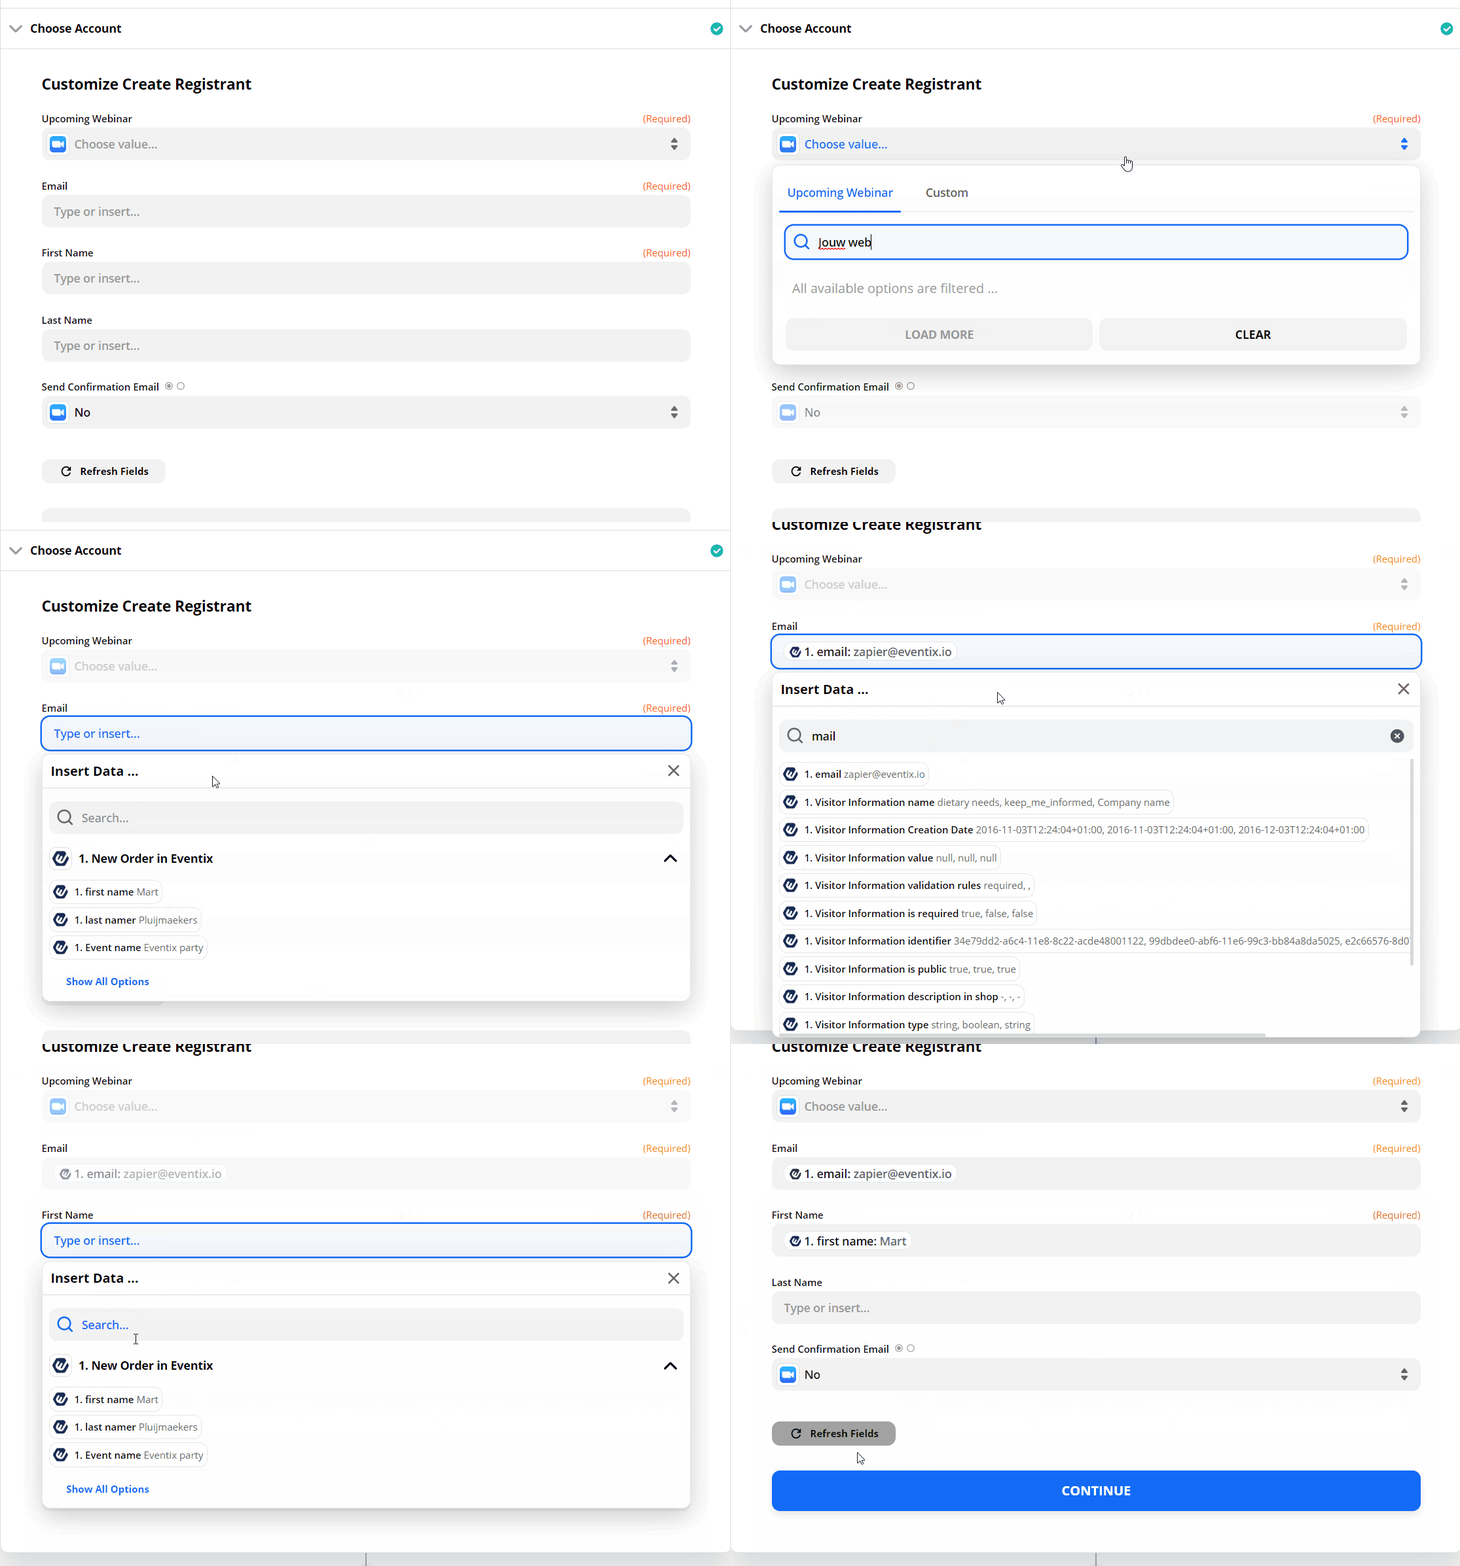
Your paid event in Zoom is set up. Have any questions or feedback? You can use the chat in the bottom-right of your screen or send an email to info@eventix.io.
Discover all the great possibilities Eventix has to offer and begin building your crowd.
Build ticket shop